How to Store Electronic Parts

Thứ hai - 06/05/2024 00:02
Whether you're an electronics hobbyist or a professional, you probably know what it's like to have your resisters, transistors, capacitors, and switches all over the place when you're working on a project. It's headache-inducing, and you...
Table of contents

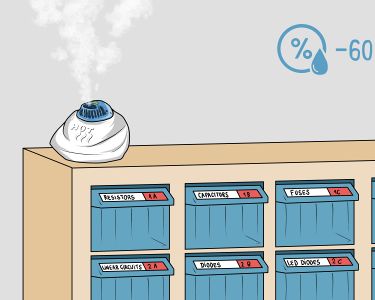
Whether you’re an electronics hobbyist or a professional, you probably know what it's like to have your resisters, transistors, capacitors, and switches all over the place when you're working on a project. It's headache-inducing, and you definitely don’t want your parts mixed up and lost. Luckily, storing them is easy! The right storage tricks can keep your parts organized and protected from the elements for maximum shelf-life. It just takes some planning and organizing. After this, your electronic parts will be safe and easy to find when you need them.

Method 1
Method 1 of 3:

Storage Container Types

  1. Step 1 Invest in a storage cabinet to organize a lot of small parts.
    If you’ve been collecting parts for years, then you might have quite a bit of them to organize and store. Electronics storage cabinets are the best option in this case. They’re large, about the size of a file cabinet, and have plenty of small compartments to hold all kinds of different parts. Getting one of these can really reduce the clutter in your workspace.[1]
    • Electronics, hardware, and office supply stores should all have plenty of options for storage cabinets. You can shop around or look online for the perfect one.
    • You'll need a lot of room for a storage cabinet. Some pros like setting them on a workbench so everything stays in the same place.
    • Most storage cabinets have an open front with a lot of small compartments that slide out like drawers. Each compartment can hold parts of the same type.
    • These cabinets are also handy for storing screws, bolts, nails, and other small parts. Just make sure you use different slots for each piece.
  2. Step 2 Store your parts in a carrying case for more portability.
    If you don’t have a lot of electronic parts, or you want to move them around a lot, then a carrying case might be a better choice than a full cabinet. They also take up a lot less space. These plastic cases look like small toolboxes and are divided into slots to store parts. You can then keep the case on a shelf or in a drawer so your space stays organized.[2]
    • Most electronic stores have tons of different carrying cases you could try. Shop around to find one with enough spaces and durability to suit your needs.
    • Some cases have removable slot walls, so you can adjust the slot size to fit larger pieces in. This type might be best if you have parts in many different sizes.
    • Since this case is portable, be careful not to lose it! Always leave it in the same place so you can find it easily.
    Advertisement
  3. Step 3 Improvise with a regular plastic box for a quick solution.
    You don't necessarily need a special case or cabinet for your parts. A plastic toolbox or tackle box can work too! If you have any extra boxes like these lying around, they'll help keep your parts organized too.[3]
    • Ideally, use a box that has sections to keep similar parts grouped together. This is why a toolbox or tackle box is a good choice.
    • Some people make their own compartments by cutting out cardboard walls and gluing them into the case. This makes individual sections so parts don't get messed up.
  4. Step 4 Use plastic bags to protect individual parts during storage.
    If you don’t have a lot of pieces, or want to protect the pieces you’re storing a little more, then all you need are shrink wrap and sealable plastic bags. Bags protect the parts from static and dust, and also keep them together.[4]
    • Don’t mix part types in the bags or you’ll have trouble finding the part that you need. Devote one bag to one part type.
    • Even if you use plastic bags, it’s still best to use another storage type like a cabinet or case. This way, you can keep them organized and get the parts you need quickly.
  5. Step 5 Leave parts in their original packaging until you’re ready to use them.
    If you buy new electronic parts, then all of this sorting and labeling is already done for you. You’ll save yourself some work if you just store the parts in their packaging until you’re ready to use them.[5]
    • The original packaging is also designed to protect the parts from static and dust, so this is an added bonus.
    • If you keep the parts in their original packaging, it’s still good to have some type of case for them. This keeps them organized and orderly.
  6. Advertisement
Method 2
Method 2 of 3:

Organization Tips

  1. Step 1 Sort all of your parts into groups with other identical pieces.
    This is a great way to get organized before storing your parts. Take some time and sort all the parts into groups. Put all the transistors, resistors, chips, and capacitors together. This way, you can find all the parts you need quickly.[6]
    • You might have to break down these groups more, depending on how many parts you have. If you have resistors of all different values, then divide them into groups of each value.
    • Information about electronic part values is usually printed on the part, so check for any markings to help with sorting them.
  2. Step 2 Dust all the parts to prevent corrosion.
    Dust can attract moisture, which will eventually start corroding your parts. Before sealing them up, always dust them off so they stay clean and safe in storage.[7]
    • For larger parts, a blast of air from canned air will should work. For smaller parts that might fly away, wipe them off with a microfiber cloth.
  3. Step 3 Wrap static-sensitive parts in anti-static foam or bags before storing them.
    Some parts, particularly transistors and integrated circuits, are sensitive to static.[8] Always put the leads for these pieces into anti-static foam, then wrap them in an anti-static bag to protect them from damage.
    • If you aren't sure whether or not a part is sensitive to static, it's best to be safe and wrap it.
  4. Step 4 Roll up wires and cables so they don't get tangled.
    Whether you have loose wires or parts with wires sticking out, you definitely don't want to waste time untangling them when you need them. Roll each wire up nicely so it doesn't get tangled up, then store each spool in its own slot so nothing wraps around it.[9]
    • Don't roll with wires tightly or you might damage them.
    • You could also roll up each wire in a spool to keep it even tidier.
  5. Step 5 Put each part type into its own bag or slot.
    While it’s not dangerous to store different parts in the same slot, it’ll be much better for organization if you give each part type its own slot. Whether you’re using a storage cabinet, carrying case, or plastic bags, put one part type in each slot.[10]
  6. Step 6 Write the name of the piece on the slot that's holding it.
    Besides sorting the parts properly, you also have to make sure you can identify each one easily. The best way to do this is labeling each slot with the part type that it holds. Write all this information with a permanent marker so you can grab the parts you need without looking too hard.[11]
    • If you don’t want to write directly onto the slot, then put down a piece of clear or masking tape and write on that instead.
    • You could also print labels and tape them to each slot if this is easier for you. Label makers are cheap and easy to get from office supply stores.
  7. Step 7 Keep a list of all the parts you have and where they are.
    If you have a lot of parts, then you might spend a lot of time trying to find the right one. Save yourself the effort later by keeping an organizational list of what you have. Write down the part type and the slot it’s stored in so you can find everything quickly.[12]
    • A paper list works fine, but some professionals like to use spreadsheets. This can help you organize a lot more information.
  8. Advertisement
Method 3
Method 3 of 3:

The Storage Environment

  1. Step 1 Check the manufacturer's instructions for specific storage requirements.
    There are some general tips that are common to most electrical parts. However, some parts might have specific temperature or humidity requirements. Always check the manual to see if there are any instructions for proper storage first.[13]
    • If you don't have the manual, then you can try contacting the part manufacturer.
  2. Step 2 Keep your storage area cool to protect the parts.
    Heat and electric parts don’t get along well. High heat can make parts degrade and could encourage corrosion. In general, keep your storage area temperature-controlled around 70 °F (21 °C) at most to get the most shelf-life from your parts.[14]
    • Some electronic parts are very resilient and can tolerate temperatures of 140 °F (60 °C). However, this isn’t ideal and the parts will start degrading at higher temperatures.[15] It’s still best to keep your storage area cool so each part lasts as long as possible.
  3. Step 3 Store the parts out of direct sunlight.
    Sunlight by itself doesn’t usually damage electronic parts, but it can degrade plastic housing.[16] Then sun can also heat up electric parts. It’s best to keep your parts in the dark and out of direct sunlight.
  4. Step 4 Set the humidity below 60% to prevent corrosion and mold.
    In humid environments, rust, corrosion, and mold can start building up on your electronic parts. The best way to protect them is to keep the humidity in the area set to about 60% so the parts stay dry.[17]
    • If your parts are in a humid spot, run a dehumidifier to keep the air dry.
    • In most cases, your garage is the worst place for electronics because of the high humidity levels. It’s best to keep your parts inside, where you can control the humidity.[18]
  5. Advertisement

Total notes of this article: 0 in 0 rating

Click on stars to rate this article